Facebook ads offer significant value due to their precise targeting, cost-effectiveness, and extensive reach. Learning how to create a Facebook ad can enhance brand awareness and increase conversions for your business. Continue reading to discover how to launch a successful Facebook ad campaign.
Benefits of Facebook Advertising
Target Your Ideal Customer
Facebook ads allow you to get very specific about who you want to target with your ads. It also uses it’s existing consumer data to help reach people that are most likely to be interested in your product or service.
Reach Your Audience For Less
The beauty of Facebook ads is you don’t need a huge budget to get started and to see results. It’s a great place to test and then scale based on what ads work well.
Get Real-Time Data
One of the best parts about digital marketing is you can specifically track what actions took place on your ad and website. This data helps you to understand what’s working and what’s not, enabling optimisation of campaigns for better results and higher return on investment.
Remarketing Capabilities
Facebook ads allow businesses to retarget users who have previously interacted with their website, or social media pages. This helps in re-engaging potential customers who have shown interest but did not convert, increasing the chances of driving sales.
Before you get started on creating Facebook Ads
- Create a Business Manager account
- Set up your Meta Pixel
- Check that your website is connected to Google Analytics (GA4)
- Ensure there are more than one admin on your Facebook Page & Business Manager
- Make sure all users have Two Factor Authentication turned on.
Create a Business Manager account
To use Facebook Ads Manager, you need to set up a Facebook business page if you don’t already have one. Note that you can’t run Facebook ads through a personal account.
After you navigate to the Facebook Ads Manager, follow the steps below:
- Select “Go to Ads Manager.”
- Confirm the information you entered on the setup page.
- Fill in your payment information.
- Save your changes.
- You can now use Ads Manager to set up your campaign and track your ads.
Set up your Meta Pixel
It is important to install the Meta Pixel onto your website before starting Facebook ads. The Meta Pixel allows you to track what actions took place on your website as a result of your ads, and provides key information which will help to inform you of what ads worked, or what ads need more optimisation.
To get your Meta Pixel set up:
- Go to the Events Manager in your FB Business Suite.
- Click the Data Sources icon on the left side of the page.
- Select the Meta Pixel you want to set up.
- Click Continue Pixel setup.
- Select Meta Pixel and click Connect.
- Select Install code manually.
- Copy the pixel base code.
- Paste the base code into the Header section of your website code. Note: if you are not familiar with your website code, pass this pixel code onto your website developer who will be able to paste it into the correct place.
- Use the Event Setup Tool to navigate to your website and complete your event set ups by tagging important actions on your website (Contact, Add To Cart, Purchase etc.)
Check that your website is connected to Google Analytics (GA4)
Ensure that your website is also connected to Google Analytics (GA4) before starting Facebook Ads. Google Analytics provides you with more data on how visitors interacted with your website after clicking through from your Facebook ad. Ensure your Google Analytics code is inserted into the header code of your website.
Ensure there are more than one admin on your Facebook Page & Business Manager
It is recommended that there is more than one user set up as admin in your Facebook Ads Manager. To ensure you do not lose your account in the event of your Facebook profile encountering issues, add a trusted friend, family member or colleague as a second admin on your account.
Make sure all users have Two Factor Authentication turned on
To protect against potential hackers, ensure that all admins and users with access to your account have two-factor authentication turned on.
Let’s Learn How To Create A Facebook Ad!
Campaign Level
Navigate to Facebook Ads Manager, either via your Meta Business Manager or Meta Business Suite page.
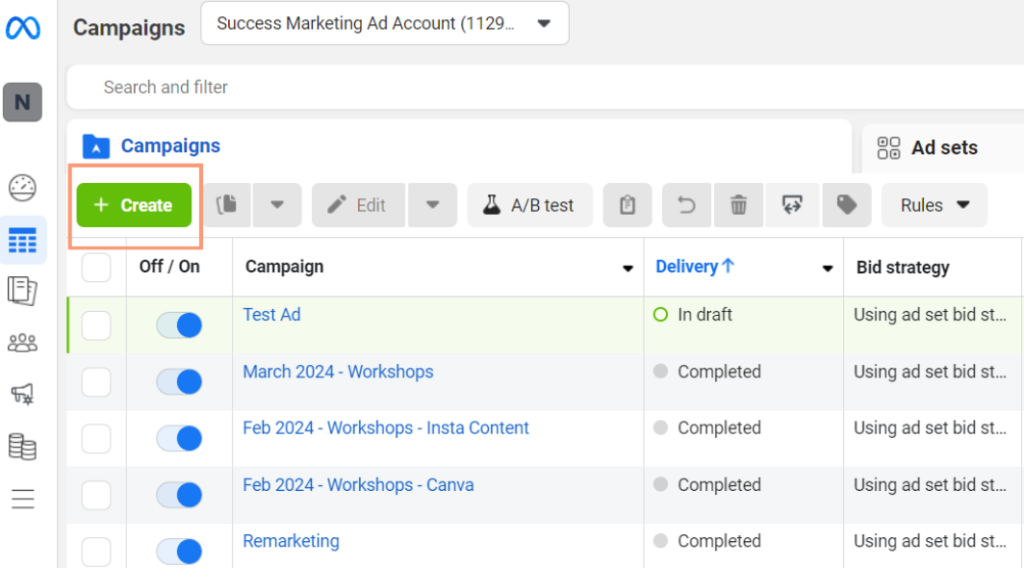
Open up the dashboard and click Create.
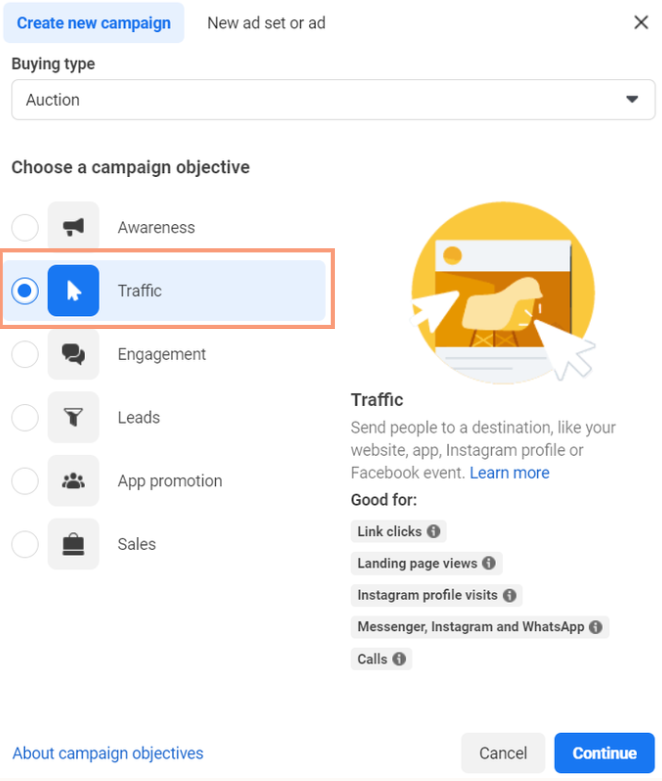
Choose an objective for your Facebook Ad. Depending on the goal of your advertising, you can select the objective that suits best. If your goal is to send people to your website to make an action (enquire or make a purchase), or to get more people to your website for general brand awareness – we would recommend selecting the Traffic objective.
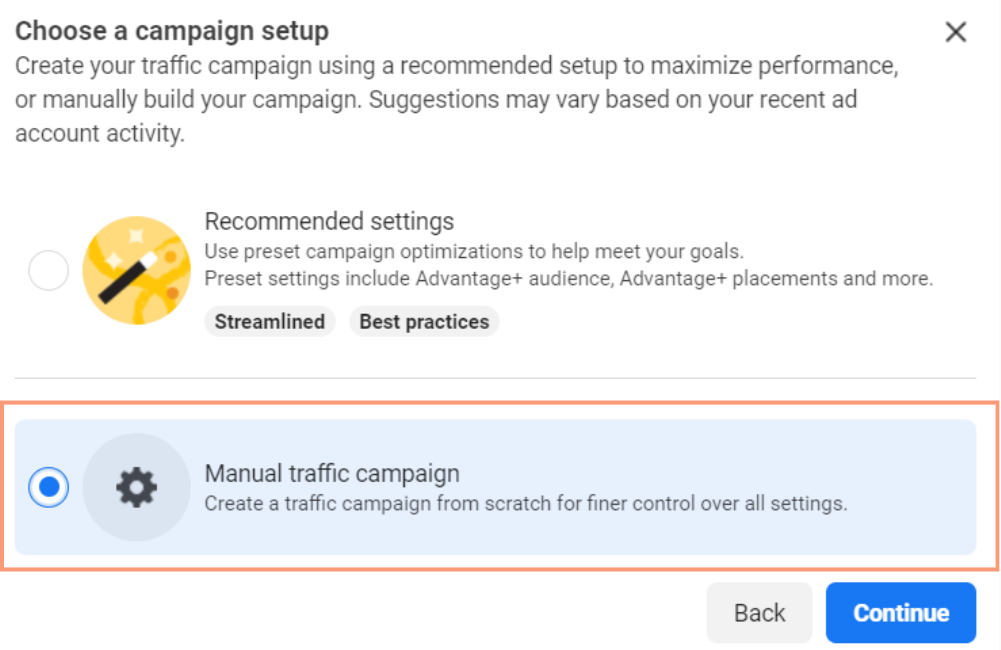
Facebook Ads will try and introduce the best settings for your campaign, you can either choose to build your campaign with it’s recommended settings, or choose manual campaign. As there are certain settings we would like to choose we will continue with Manual Traffic Campaign.
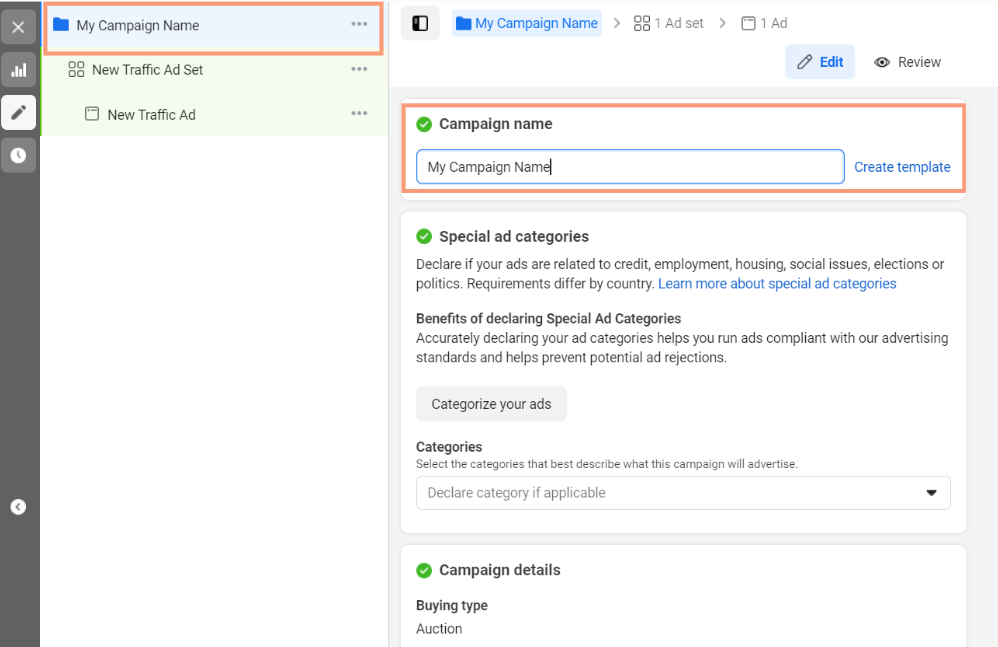
You will be brought into the ad creation section, starting with your Campaign level. Rename your campaign so you can recognise it when you come back into the account, then click Next.
Ad Set Level
You will then move to the Ad Set section of the ad creation. Rename your ad set to your target audience. Select Website as your conversion location.

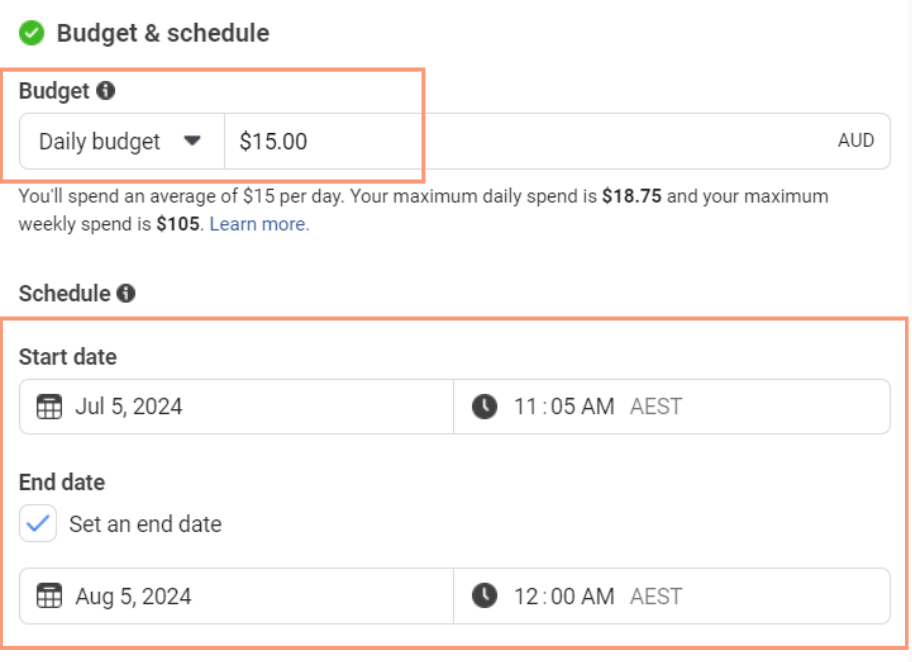
Set your daily budget and choose your schedule. (Recommend 7 to 30 days campaign length)
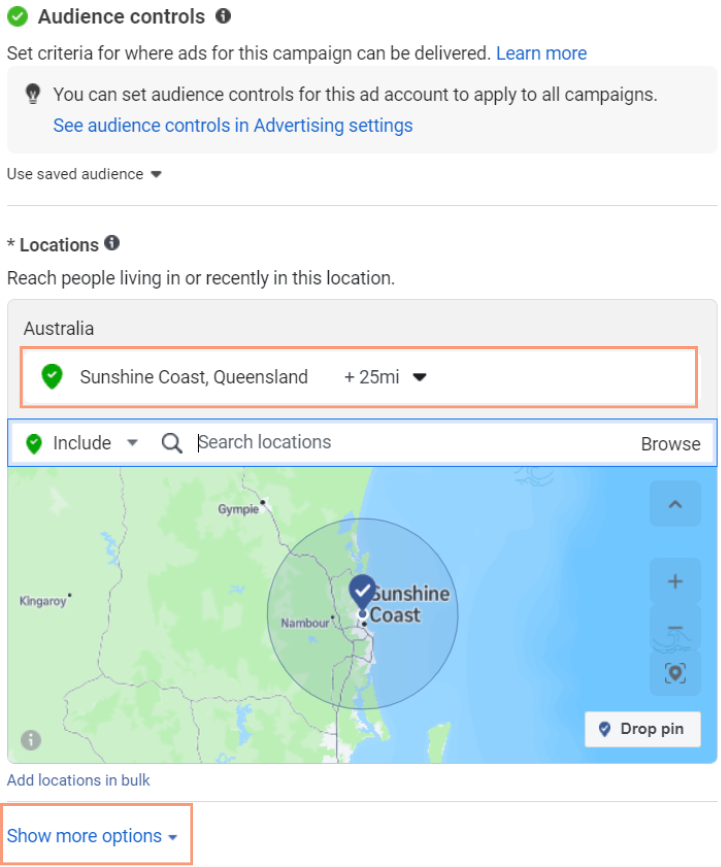
In Audience Controls, click on Australia to edit.
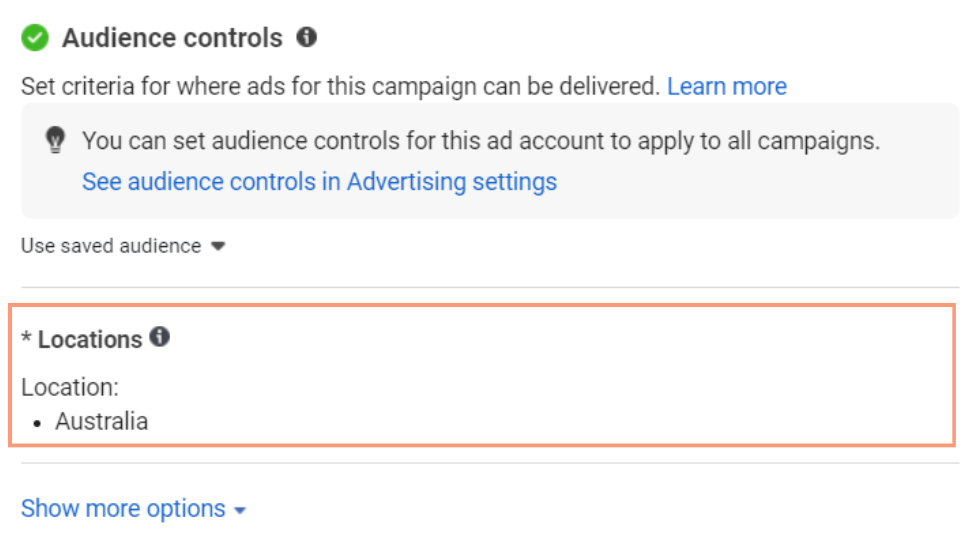
Select what locations you want to target in your ad, then click on Show More Options.
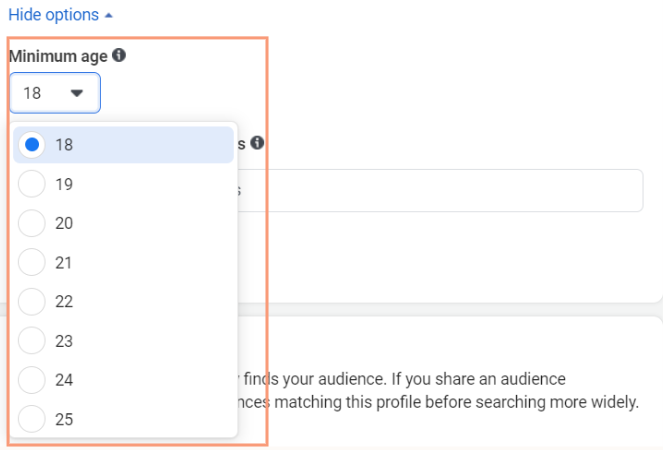
Choose the minimum age for your ad. Note the minimum age can’t be older than 25 if you are using Advantage+ placements audience.
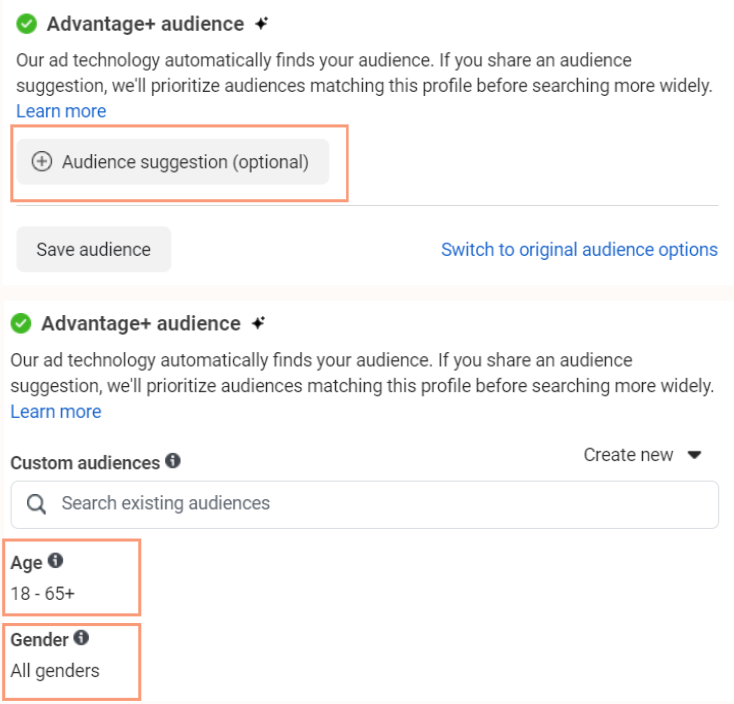
Option 1
Click Audience suggestion and insert your target audience for the ad. This uses Meta’s new AI audience targeting, it will use this data as a suggestion, but can feed out the ad to other ages as well.
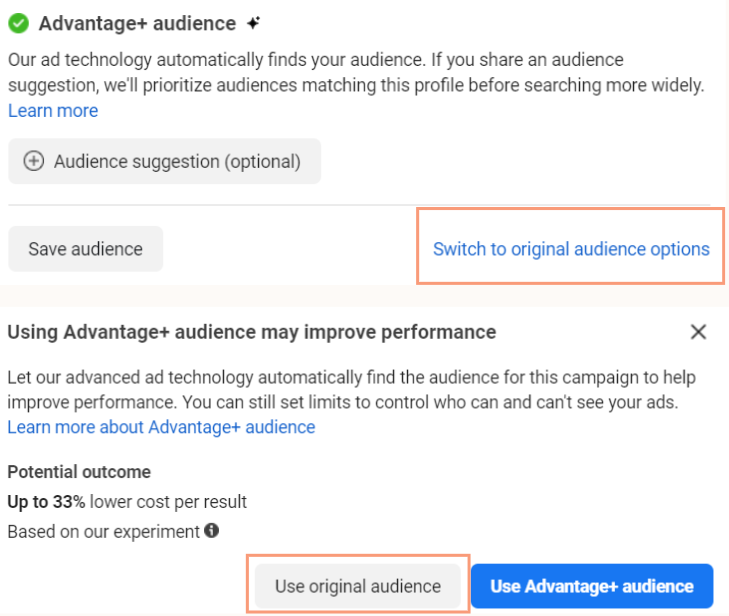
Option 2
OR, select ‘switch to original audience options’. This gives you complete control over your audience and ads will only serve to the ages that you input. Meta is trying to use more AI in their ads, so it is pushing us to use Advantage+ audience (the first option in step 10). You can choose which audience you want to test.
Set up the age and gender demographics you want to target.
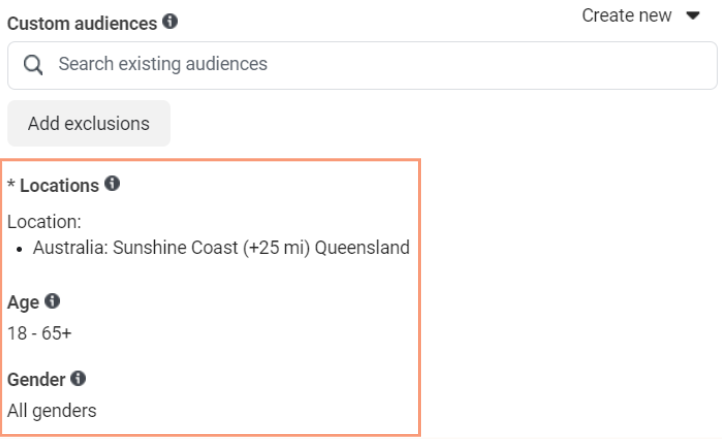
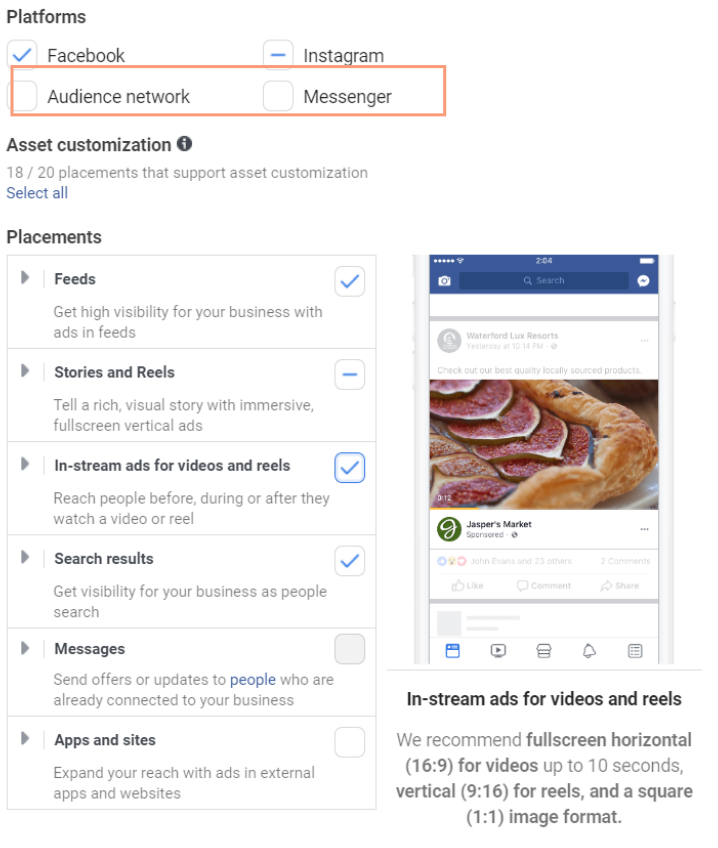
You have the option to use Facebooks automatic placement settings in Advantag+ Placements. Or, you can manually select where you would like your ads to be displayed. If you would like to manually select these settings – Click on Advantage+ placements to edit.

If using Manual Placements, we recommend unticking Audience Network and Messenger.
Then click Next to move into ad creation section.
Ad Creative Level
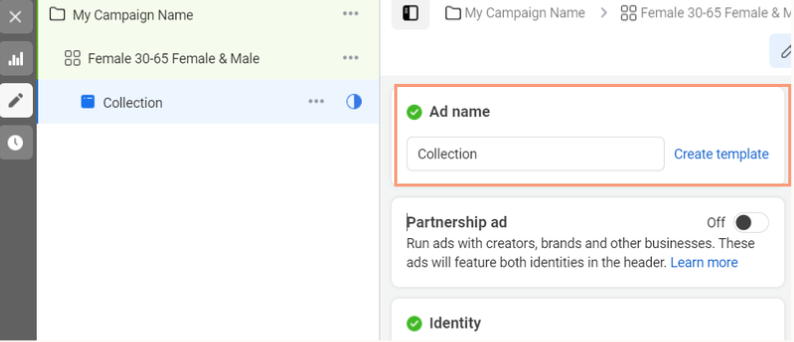
Name your ad (image, video, collection or carousel)
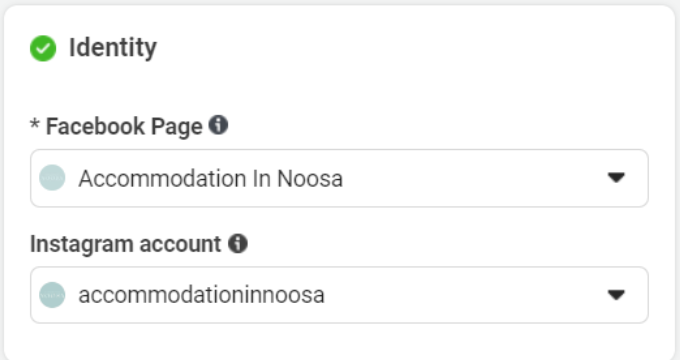
Ensure your Facebook Page and Instagram Account are selected.
Choose your ad format. There is no ‘better’ format to use – so it is important to test different creatives to understand which ad format your audience best engages with.
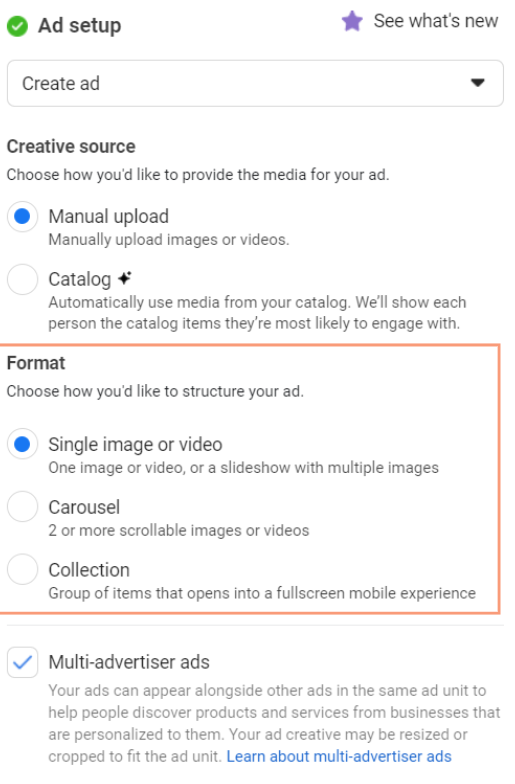
Write your primary text, make sure you look at your ad preview to the right of the screen before publishing so you can see that your first sentence hasn’t been cut off. If it has, make it shorter and punchier!
The best format to follow is; 1. Short, sharp headline 2. Body text that explains your products/service/offer 3. A call to action (eg. visit our website, call us)
Then insert your short, snappy headline!
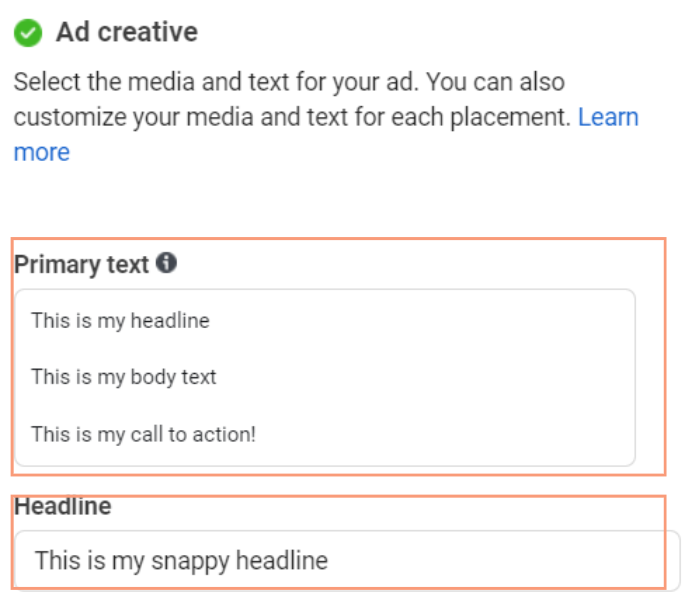
In this example we will put together a Collection ad.
Click Create New.
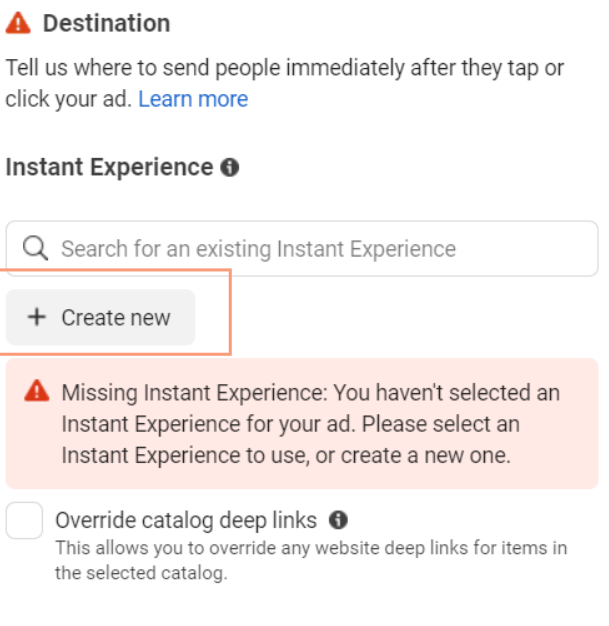
Click Add Components.
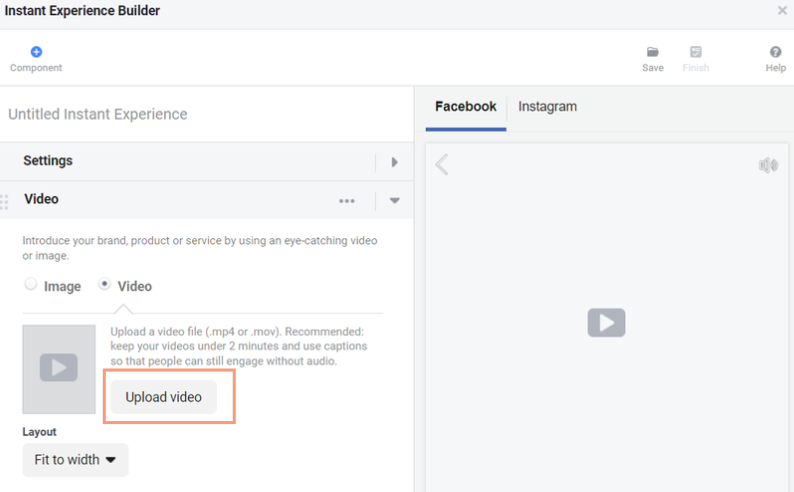
Choose what components you would like in your ad. We like to use an Image or Video, then a carousel.
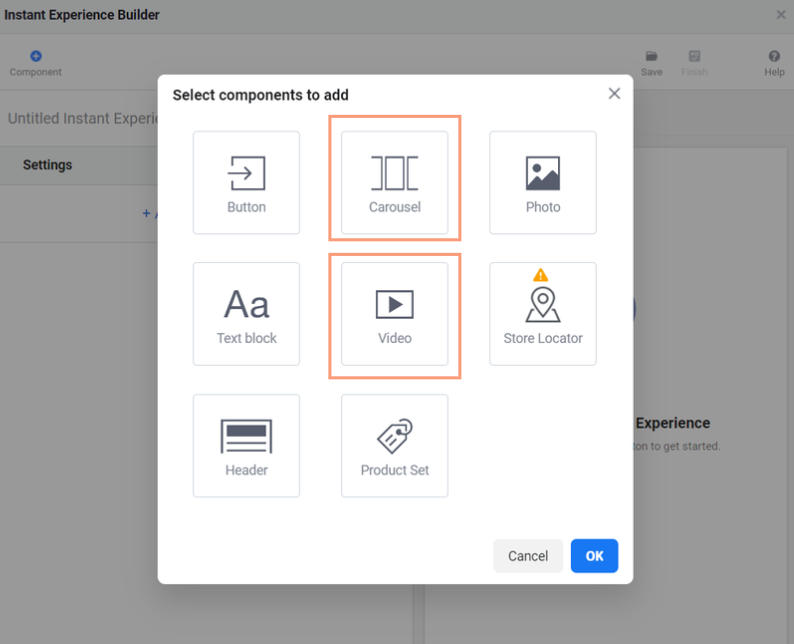
Select upload video (or upload image if you want to use an image instead). And choose the video file you want to use.
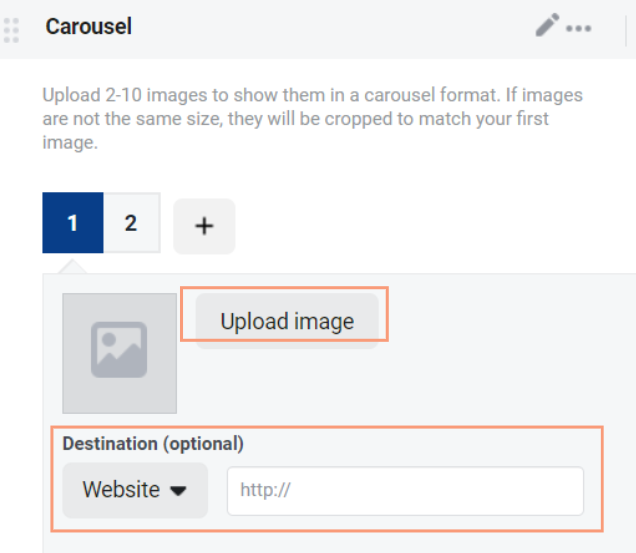
Upload images to your carousel. You will need at least 4 images or an error message will display once the ad is finished. Make sure you include a link on each carousel image.
Click Save and then Finish.
Note: if you need to edit your Collection ad after you have saved and finished it, click Preview, then Duplicate – here you will be able to edit the contents of the collection ad, before you Save and Finish the ad again.
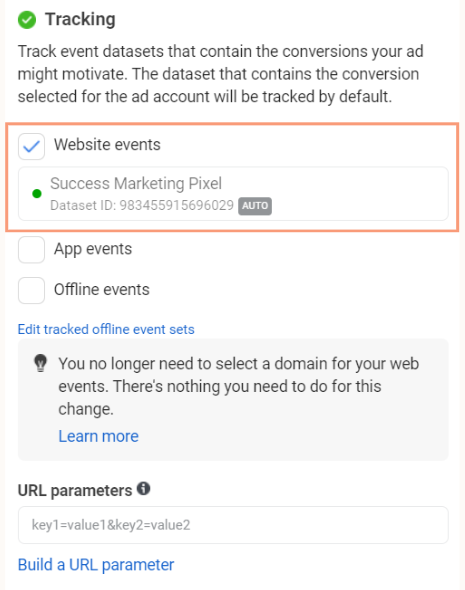
Ensure that Website Events is clicked under tracking, and it is picking up your pixel.
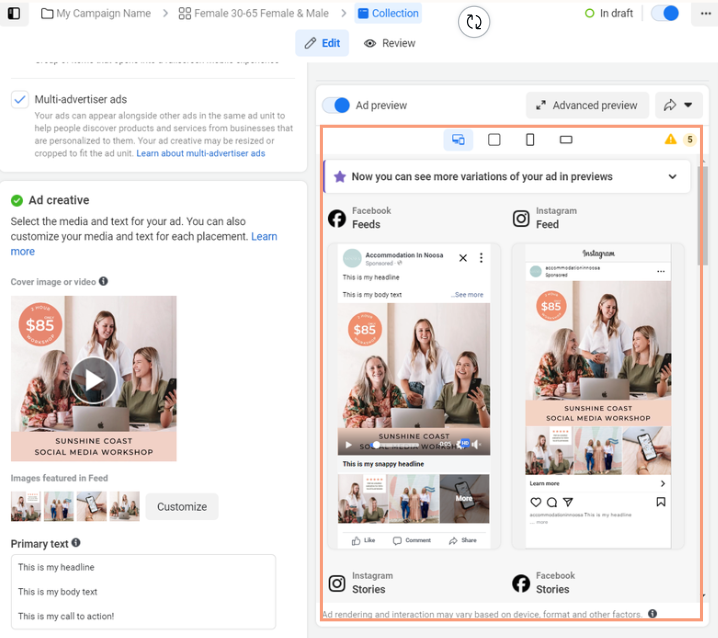
Check over your ad under the preview section and make sure you are happy with how it is displaying. Then press Publish.
Partner with your Leading Sunshine Coast Facebook Ads Specialist
Need some help putting it all together? Talk to us at Success Marketing about setting up and optimsing your Facebook Ads. We’ll ensure your Meta Pixel is installed correctly, your website is connected to GA4 for appropriate tracking and data collection, and we’ll make sure your Facebook ads are set up to succeed!
Talk to us today to get started with Facebook ads.

